This guide will explain how to convert FLAC files to MP3 using dBpoweramp Music Converter.
You can download a trial of dBpoweramp Music Converter from HERE.
Once installed open dBpoweramp and then click on the icon for “Batch Converter” as shown below.

The dBpoweramp Music Converter main window will appear. Use the folder view on the left to navigate to the folder containing the files you want to convert. Next click on the folder to select the files that you want to convert.
Click on the “Convert” button in the top left corner.

A new window will appear. From the drop down menu at the top click on “Multi Encoder” and then click “Add Encoder” on the right. As shown below.

Another new window will appear. At the top change the “Encoding” to mp3 (Lame). Here you can choose if you want variable bitrate (VBR), constant bitrate (CBR), average bitrate (ABR) or Free Format.
For this guide we will be using the popular “variable bitrate” option. The slider below lets you choose the quality. For this guide we will be using the highest quality which is the V0 option.
Everything should now be setup as the screenshot below.

The “Output To” lets you choose where the new MP3 files will be saved. This can easily be changed by choosing different options from the drop down box.
- Existing Source Folder(s): converted tracks are written to same folder as the source file(s).
- Single Folder: all files written to a single folder of your choosing
- Preserve Source Path: allows the selection of a base drive or folder, into which the full source path is added and source filename.
- Edit Dynamic Naming: substitutes programmable elements, such as [artist] and replaces with real values from the ID Tags.
This guide will give an example of the dynamic naming feature. The output MP3 files will be created inside the current folder with the FLAC files we are converting, but inside a subdirectory with [MP3-V0] in the name.
Click on the drop down box and select “Edit Dynamic Naming“.

The following window will appear.
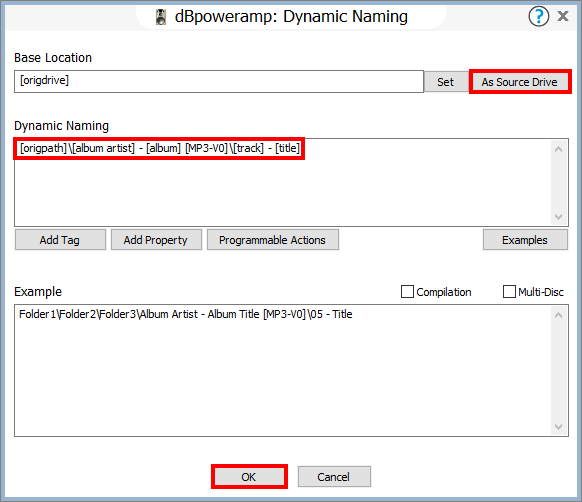
Click on “As Source Drive” as highlighted above. Then in the “Dynamic Naming” section paste in the following and then click on “OK“.
[origpath]\[album artist] - [album] [MP3-V0]\[track] - [title]The folder and track naming structure will now look like this:

Some of the other common values that can also be used for the naming structure are:
[artist]
[album]
[title]
[genre]
[year]
[origpath] = the source file path (used when converting, not CD Ripping]
[origfilename] = the source filename (minus extension, again used when converting)
[origdrive] = drive source files are on, example C:\
More details can be found on naming files dynamically can be found HERE.
When everything is set you will be returned to the following menu. Just click on “Convert >>” and dBpoweramp Music Converter will start the conversion process.


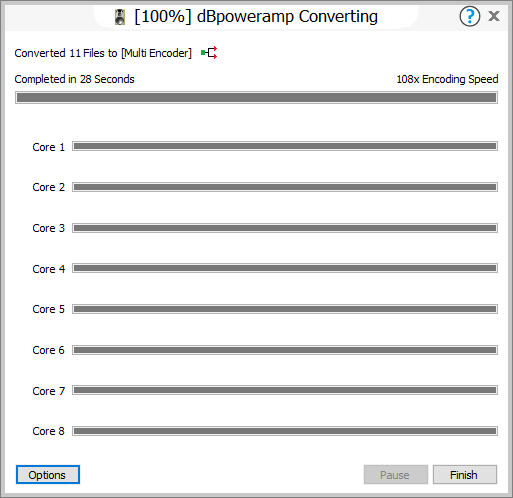
When it has finished the following window will appear. Click on “Finish” and the fresh MP3 files can be found in the folder you selected during setup.